
Timber wall boards can change a space fast. They add warmth, texture, and a clean linear look. They can also protect a wall and hide minor defects. However, timber is a natural material. It reacts to heat and humidity. So, the profile, moisture level, and finish matter as much as the species. In this guide, you will learn what these boards are, how they differ from sheet products, and how to choose the right option for interior lining or exterior cladding. You will also get a simple buying checklist you can copy into your purchase order, plus install tips that help reduce gaps, cupping, and early coating failure.
What timber wall boards are and what they are not
Timber wall boards are long boards or linear lining profiles fixed to studs, battens, or a backing wall. They may be solid timber, finger-jointed timber, or an engineered board with a timber face. You can use them inside as wall lining. You can also use them outside as cladding, but only when the full wall system is designed for weather.
What they are
- A board-based lining that creates a visible timber surface.
- A profile system that can be installed horizontal or vertical, depending on design.
- A surface you can paint, stain, or clear coat.
What they are not
- A “no-movement” product. Timber still expands and contracts.
- A waterproof barrier by itself. Exterior walls still need wraps, flashings, and drainage.
- A one-size-fits-all solution. Interior and exterior needs are different.
If you need a seamless wall with no joints, sheet products may be easier. In that case, wood wall panels or plaster systems can give a flatter finish. Still, boards often win on visual depth and repairability.
Timber wall boards Main types and options
Most wall lining boards fall into four profile families. Each one has a clear “best use” case.
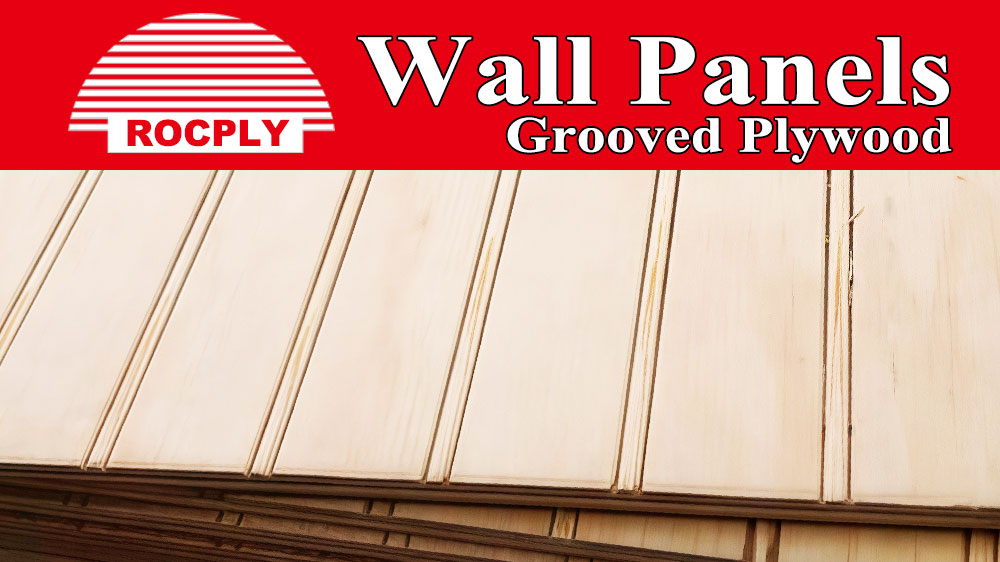
1) Tongue and groove boards (T&G)
Tongue and groove boards lock together with a tongue on one edge and a groove on the other. As a result, joints look neat and aligned. This profile is common for interior wall lining. It is also used for some exterior cladding systems, when paired with the right cavity and coating.
T&G is popular because it installs fast. It also helps control small gaps. Many builders like the clean look, because the joint can feel close to seamless.
2) Shiplap and overlap boards
Shiplap boards overlap at the edges. That overlap can hide small movement. It can also handle water run-off better in many exterior layouts. Some timber guides note shiplap sheds water more easily than tongue and groove due to the joint design.
In practice, shiplap is chosen when you want a more relaxed look with a visible reveal. It also suits walls that may see wider temperature swings.
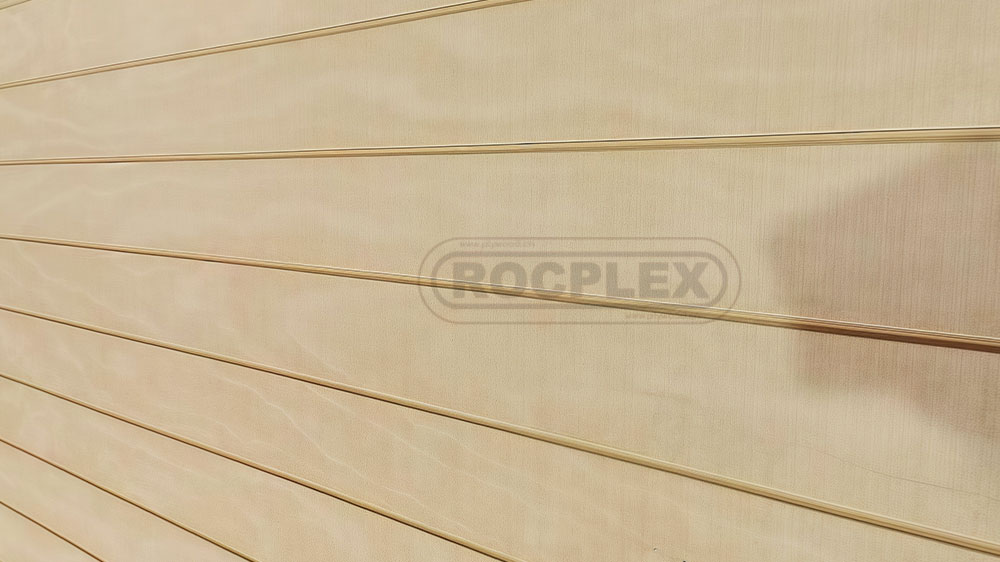
3) V-groove and V-joint profiles
V-groove boards create a clear “V” shadow line at each joint. This gives a crisp, modern finish. It also hides minor alignment issues. Some cladding guides describe V-groove as a flat surface with a distinct “V” between boards once installed.
This profile works well on feature walls. It also suits taller rooms, where shadow lines can add rhythm without looking busy.
4) Slatted and batten-style linings
Slat walls and batten-style boards are used for feature walls, modern retail, and acoustic-style designs. They can be solid timber. They can also be timber-faced systems on rails. Either way, straight framing is critical. Spacing must be consistent, or the wall will look uneven.

How to choose timber wall boards for your project
Start with the service environment. Then lock the board spec. This order reduces mistakes and claims.
Step 1: Interior or exterior?
Interior lining boards focus on appearance and easy cleaning. Exterior cladding boards must manage sun, rain, and wind. Therefore, exterior products need a durable species or treatment, a suitable coating system, and a ventilated cavity approach to help the wall dry.
For exterior projects, many guides highlight naturally durable softwoods used for cladding, such as cedar, larch, and Douglas fir, depending on market supply.
Even with durable timber, detailing and maintenance still matter.
Step 2: Choose the look first
Pick the profile that matches the style you want:
- Near-seamless look: tight T&G or fine V-joint.
- Strong shadow lines: V-groove or slats.
- Rustic overlap: shiplap or weatherboard style.
Also decide direction. Vertical boards can make a wall feel taller. Horizontal lines can make a room feel wider. Some wall panelling guides describe this effect clearly for vertical and horizontal installations.
Step 3: Set a realistic maintenance plan
A clear coat can look premium indoors. Outdoors, it often needs more frequent upkeep. Painted boards can hide repairs and protect the surface longer. Stains can be a good middle ground when matched to exposure.
If the site is coastal, windy, or high UV, plan for shorter repaint cycles. If the wall is sheltered, coatings usually last longer.
Step 4: Confirm the non-negotiables in the purchase order
Use this checklist so different suppliers quote the same target. It also reduces “it looked different from the sample” issues.
Buyer checklist (copy into your PO)
- 1) Profile and joint type (T&G, shiplap, V-groove, batten/slat).
- 2) Intended use (interior lining or exterior cladding system).
- 3) Species or face material, and whether it is treated or naturally durable.
- 4) Board size: thickness, width, length, and tolerance limits.
- 5) Moisture content at packing, plus storage and acclimation guidance.
- 6) Grade rules: knots, colour range, and allowable defects.
- 7) Finish system: raw, primed, or pre-finished; coating type and touch-up method.
- 8) Packing method: wrap, corner guards, straps, and pallet base.
- 9) Traceability: batch number or production date on packs.
If you follow this list, you can specify your lining boards by performance, not only price. In addition, you can compare quotations faster.
[Internal link: Timber treatment / treated timber guidance]
[Internal link: Pre-primed or pre-finished boards / finish options]
Timber wall boards installation and best practices
Good boards can still fail with poor site practice. These steps prevent most issues, and they are easy to follow.
- 1) Store boards flat and dry. Keep packs off the ground. Keep them wrapped until use.
- 2) Acclimate before fixing. Let boards sit in the room or on site so they adjust.
- 3) Start with a straight frame. Check the wall plane. Pack battens where needed.
- 4) Use the right fixings. For exterior, corrosion resistance matters.
- 5) Do not force joints tight. Leave the system’s expansion gaps.
- 6) Lay the first board perfectly. A small error grows across the wall.
- 7) Seal cut ends when required. End grain absorbs moisture fastest.
- 8) Plan corners and openings early. Flashings and trims decide the outcome.
- 9) Mix boards from multiple packs. This evens out colour and grain.
- 10) Choose direction with intent. Vertical can add height. Horizontal can add width.
For exterior cladding, the cavity and wrap details matter more than many buyers expect. If water gets behind boards, the wall must be able to drain and dry. Otherwise, paint can peel and boards can distort.
Common problems and fixes
Most problems come from moisture, storage, or poor detailing. Here are the common ones, with practical solutions.
Problem 1: Visible gaps after installation
Cause: boards were installed too wet, or the room dried later.
Fix: acclimate first. Follow spacing guidance. If movement is likely, use profiles that hide joints better, such as shiplap or V-groove.
Problem 2: Cupping or bowing
Cause: uneven moisture on board faces, or poor storage in sun and wind.
Fix: store flat with airflow. Avoid direct sun on stacked packs. Finish faces evenly where required.
Problem 3: Coating failure outside
Cause: wrong coating for exposure, or no cavity behind the cladding.
Fix: use a coating system designed for the climate. Keep ventilation behind boards. Plan a maintenance cycle. Exterior timber needs planned upkeep.
Problem 4: Uneven lines on slat walls
Cause: framing is not straight, or spacing tools were not used.
Fix: level and pack the battens. Use a spacer jig. Check every few rows.
Even when you use wood wall panels for fast fit-outs, these risks still apply. However, board profiles can make joints more visible. Therefore, QC matters more.
What affects timber wall boards pricing
Pricing is driven by more than thickness. In most quotes, the main cost drivers are:
- timber grade and appearance limits (clear grades cost more)
- species durability or treatment level for exterior use
- profile complexity and machining accuracy
- pre-primed or pre-finished coating systems
- length mix and waste factor (long boards often cost more)
- packing strength for long-distance shipping
- certification and documentation requirements
Therefore, the best value is often a stable mid-grade board with a reliable finish system. It performs well, and it reduces labour time on site.
FAQ
Are timber wall boards suitable for bathrooms?
They can be, but only with ventilation and the right coating. Avoid splash zones unless the system is designed for wet rooms. Seal cut ends. Keep moisture stable. If you want low maintenance, choose moisture-rated sheet linings instead.
What is the difference between shiplap and tongue and groove?
T&G locks together and can look close to seamless. Shiplap overlaps and shows a small reveal. Shiplap joints can handle run-off well on many exterior walls. Some guides highlight this water-shedding advantage.
Can I install these boards vertically?
Yes, many profiles can be installed vertically. Vertical lines can make a room feel taller. Horizontal lines can make it feel wider. Choose the layout based on the space, the lighting, and the framing plan.
Do I need a cavity behind exterior timber cladding?
In many wall systems, a ventilated cavity helps drying and reduces coating stress. It also helps manage wind-driven rain. Always follow the full cladding system detail, not just the board profile.
How do I match batches for a large project?
Approve one control sample. Then lock grade rules, colour range, and moisture targets in the PO. Ask for batch labels on packs. Mix boards from different packs during install, so the wall looks even.
What finish is best: paint, stain, or clear coat?
Indoors, all three can work well. Outdoors, paint often offers longer protection. Clear coats can look great but may need more upkeep. Stains can be a balanced option when matched to exposure and species.
How many extra boards should I order for waste?
Waste depends on layout and board length mix. Complex corners and many openings increase waste. For clean layouts, waste is lower. For feature walls with trims and cuts, plan more spare boards to keep colour consistent.
Post time: Feb-16-2026